Solving Mike Treit's Interview Problem
My twin brother Mike has a favorite interview question involving finding the common integers between 2 very large (50GB each) binary files. His requirements are highly pragmatic: he doesn’t care how you get the answer, just give him a third binary file that contains the common integers by the end of the day.
Practical problem solving
This is my kind of problem. I’m not a highly skilled programmer and would certainly bomb most data structures and algorithm style job interviews, but in my day job as a security researcher, I am pretty good at hacking something together to find the right answer. It might not be the most elegant or efficient solution, but I can usually get the job done. Figuring out how to use the available tools at my disposal to solve a problem is part of what makes my job so much fun.
Using what I have at hand
When I read Mike’s blog post, my immediate thought was: “ok, if this was something I had to do by the end of the day, what would I actually reach for?” The answer was immediate: I’d use PySpark.
At the time, I was doing a lot of data analysis using PySpark: mostly hunting for attack patterns in vast amounts of telemetry data, that kind of thing. Spark seemed like a logical choice for taking 2 large files and finding the common integers between them - it should just be a simple inner join on the distinct integers in each file.
Let’s do it.
The environment
For the purposes of this blog post, I’ll assume we don’t have anything up and running and walk through how to get an environment stood up to use Spark to solve the problem. That way we can spin up what we need and tear it all down when we’re done.
Operating system
I’ll be running from Kali Linux in WSL2 on Windows 11.
Cloud
We’ll need a Spark cluster to run our computation on. If I was really solving this problem at work I’d use an existing Azure Synapse workspace or similar, but since this is a personal project I’ll spin up something myself. I’m most familiar with Microsoft Azure, so let’s go with that as our cloud environment.
Install Azure CLI
Let’s make sure we have the command line tools we need for interacting with Azure. Full instructions can be found here.
1
2
sudo apt-get update
sudo apt-get install azure-cli
💡 Fun Fact: Azure CLI is written in Python 🐍
Create a Python virtual environment
For most any project, I’ll wind up using Python at some point, so I always spin up a virtual environment.
I’m running 3.11.9 at the moment.
1
2
python3 -m venv .venv
source .venv/bin/activate
Login in Azure
1
az login
You should get prompted to authenticate and select your Azure subscription.
Create a resource group
We’ll create a dedicated resource group for our project that will hold all our Azure artifacts, which we can tear down when we’re done.
1
az group create --name mikeinterview --location westus
You should see:
1
2
3
4
5
6
7
8
9
10
11
{
  "id": "/subscriptions/<yoursubscriptionid>/resourceGroups/mikeinterview",
  "location": "westus",
  "managedBy": null,
  "name": "mikeinterview",
  "properties": {
    "provisioningState": "Succeeded"
  },
  "tags": null,
  "type": "Microsoft.Resources/resourceGroups"
}
Create a storage account
We’ll put our data here.
1
2
3
4
5
6
7
az storage account create \
    --name mikeinterviewstg \
    --resource-group mikeinterview \
    --location westus \
    --sku Standard_LRS \
    --kind StorageV2 \
    --enable-hierarchical-namespace true
Once the storage account is created we can add a blob container to hold our data.
1
az storage container create --account-name mikeinterviewstg --name interview
Generate the data
Mike provides the C# code to generate the input files.
1
2
3
4
5
6
7
8
9
10
11
12
13
14
15
16
17
18
19
20
21
22
23
24
25
26
27
28
29
30
31
32
33
34
35
36
37
38
using System.Buffers.Binary;

if (args.Length < 2)
{
    Console.WriteLine($"Usage:");
    Console.WriteLine($"Program.exe <filepath> <size> <seed>");
    return;
}

var filename = args[0];
if (!long.TryParse(args[1], out var size))
{
    Console.WriteLine("Invalid input.");
    return;
}

if (!int.TryParse(args[2], out var seed))
{
    Console.WriteLine("Invalid input.");
    return;
}

var r = new Random(seed);
using var fs = new FileStream(filename, FileMode.Create);

var buff = new byte[4];

var buffer = size < (1024 * 1024 * 1024) ? new byte[size] : new byte[1024 * 1024 * 1024];
var totalWritten = 0L;

while (totalWritten < size)
{
    r.NextBytes(buffer);
    long amountToWrite = size - totalWritten;
    fs.Write(buffer, 0, (int)Math.Min(amountToWrite, buffer.Length));
    totalWritten += buffer.Length;
}
Console.WriteLine($"{totalWritten} bytes written.");
Let’s create a quick console app to run the code.
1
2
3
dotnet new console --name interview
cd interview
code Program.cs
Replace the code of Program.cs with the above C# code.
We’ll need 2 random seeds, one for each file, which we’ll want to store so we can provide them to Mike to verify our answer.
We’ll create two random files of 50 gigabytes each (technically 2^30 bytes = 50 gibibytes but let’s not be too pedantic).
1
2
3
4
5
6
7
8
dataBytes=$((2**30*50)) # 53,687,091,200 bytes
seed1=$((RANDOM % 1001))
seed2=$((RANDOM % 1001))
echo $dataBytes > interviewparams
echo $seed1 >> interviewparams
echo $seed2 >> interviewparams
dotnet run ./1.bin $dataBytes $seed1
dotnet run ./2.bin $dataBytes $seed2
This will take a few minutes to run, and you’ll have your 2 50 GB input files.
1
2
53687091200 bytes written.
53687091200 bytes written.
On my machine it took about 10 minutes total.
Let’s look at the data. For a quick peek at the raw file contents, I like Hexyl.
1
2
3
sudo apt install hexyl
hexyl --length 64 1.bin
hexyl --length 64 2.bin
This will show us the first 64 bytes from each of the input files. 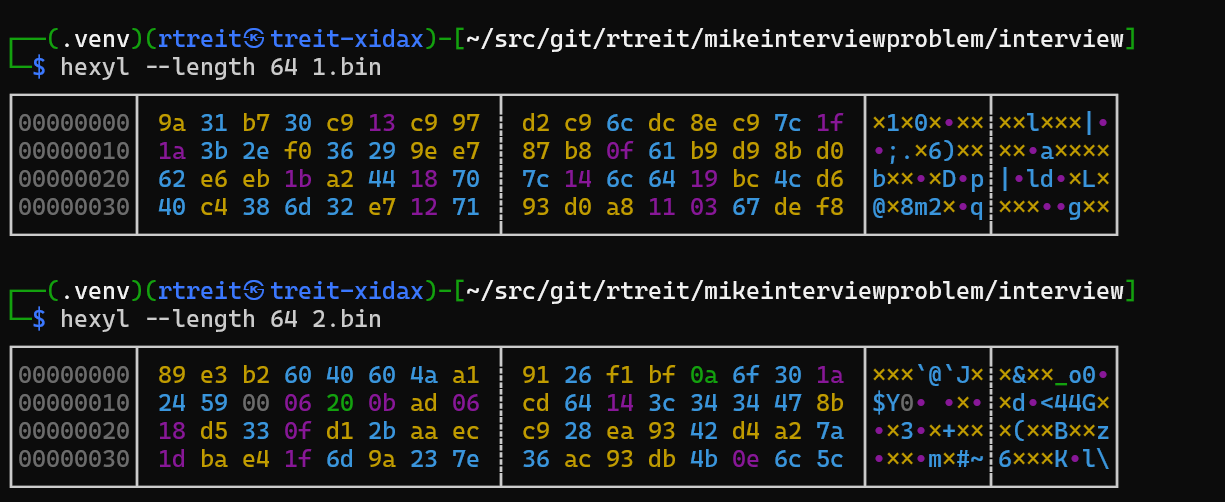
What is this telling us? Well we know from Mike’s blog post that each file is a sequence of 32 bit integers, in little endian byte order. So we’re looking at the raw bytes for 16 32-bit integers from each file. We can convert a couple of the integers from the first file’s output with a simple Python command using the highly useful struct module:
1
2
python3 -c "import struct; print(struct.unpack('<i', bytes.fromhex('9a31b730'))[0])"
python3 -c "import struct; print(struct.unpack('<i', bytes.fromhex('a2441870'))[0])"
So each file consists of 13,421,772,800 32 bit integers. Our task is to output a 3rd little endian binary file with the integers that are shared between the 2 files. Let’s get to work!
Upload the Data to the cloud
AzCopy is an amazing tool for working with Azure storage.
Install AzCopy
1
2
3
4
5
wget https://aka.ms/downloadazcopy-v10-linux -O azcopy_linux.tar.gz
tar -xvf azcopy_linux.tar.gz
sudo mv azcopy_linux_amd64_*/azcopy /usr/local/bin/
rm -rf azcopy_linux.tar.gz azcopy_linux_amd64_*
azcopy --version
Grant ourselves the necessary permissions.
1
2
3
4
az role assignment create \
    --assignee <your-user-principal-name-or-object-id> \
    --role "Storage Blob Data Contributor" \
    --scope /subscriptions/<your-subscription-id>/resourceGroups/mikeinterview/providers/Microsoft.Storage/storageAccounts/mikeinterviewstg
Now we’ll get a SAS token to our container and upload the binary files.
1
2
3
4
5
6
7
8
9
10
11
12
13
14
15
16
17
18
19
20
21
22
23
24
25
26
27
28
29
30
31
storageAccountName="mikeinterviewstg"
containerName="interview"
filePath="1.bin"
blobName="1.bin"
expiryDate=$(date -u -d "+5 days" +"%Y-%m-%dT%H:%M:%SZ")
sasToken=$(az storage container generate-sas \
    --account-name $storageAccountName \
    --name $containerName \
    --permissions rwdl \
    --expiry $expiryDate \
    --auth-mode login \
    --as-user \
    --output tsv)

if [ -z "$sasToken" ]; then
  echo "Failed to generate SAS token."
  exit 1
fi

echo "SAS token generated successfully."

blobUrl="https://${storageAccountName}.blob.core.windows.net/${containerName}/${blobName}?${sasToken}"

azcopy copy "$filePath" "$blobUrl"

if [ $? -eq 0 ]; then
  echo "File uploaded successfully to the blob container."
else
  echo "Failed to upload the file."
  exit 1
fi
After repeating for the second file (2.bin) we have our data in the cloud and ready to be processed.
1
2
3
4
5
az storage blob list \
    --account-name mikeinterviewstg \
    --container-name interview \
    --auth-mode login \
    --output table
Result:
1
2
3
4
Name    Blob Type    Blob Tier    Length       Content Type              Last Modified              Snapshot
------  -----------  -----------  -----------  ------------------------  -------------------------  ----------
1.bin   BlockBlob    Hot          53687091200  application/octet-stream  2024-09-22T02:15:35+00:00
2.bin   BlockBlob    Hot          53687091200  application/octet-stream  2024-09-22T11:54:39+00:00
Configure Databricks
From my experience, you can’t beat Databricks when it comes to Spark-based big data processing systems.
Register necessary providers
We’ll need Compute and Databricks providers to be enabled for our subscription.
1
2
az provider register --namespace Microsoft.Compute
az provider register --namespace Microsoft.Databricks
Create an Azure Databricks workspace
1
2
az extension add --name databricks
az databricks workspace create --resource-group mikeinterview --name mikeinterview --location westus --sku standard
Install Azure Databricks command line interface (CLI)
We’ll need this momentarily.
1
curl -fsSL https://raw.githubusercontent.com/databricks/setup-cli/main/install.sh | sudo sh
Create a personal access token (PAT)
Get your Databricks workspace URL.
1
echo "https://$(az databricks workspace show --resource-group mikeinterview --name mikeinterview --query 'workspaceUrl' --output tsv)"
Click the URL or paste it into your browser and login to Databricks. 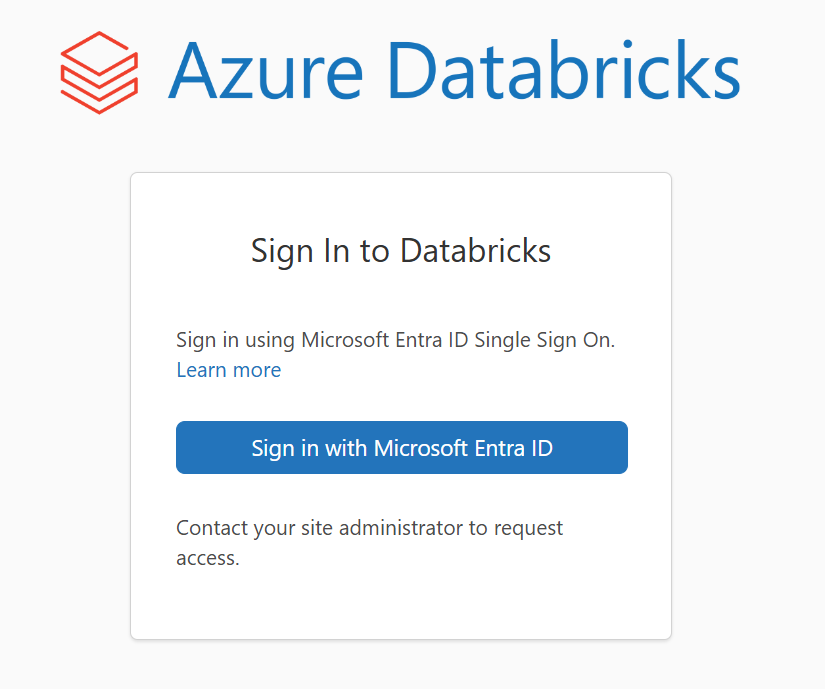
Generate a PAT in the Databricks portal. First click on your profile and select Settings. 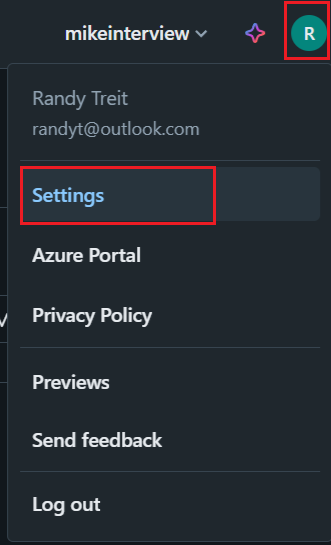
Next click on Developer and Generate new token. 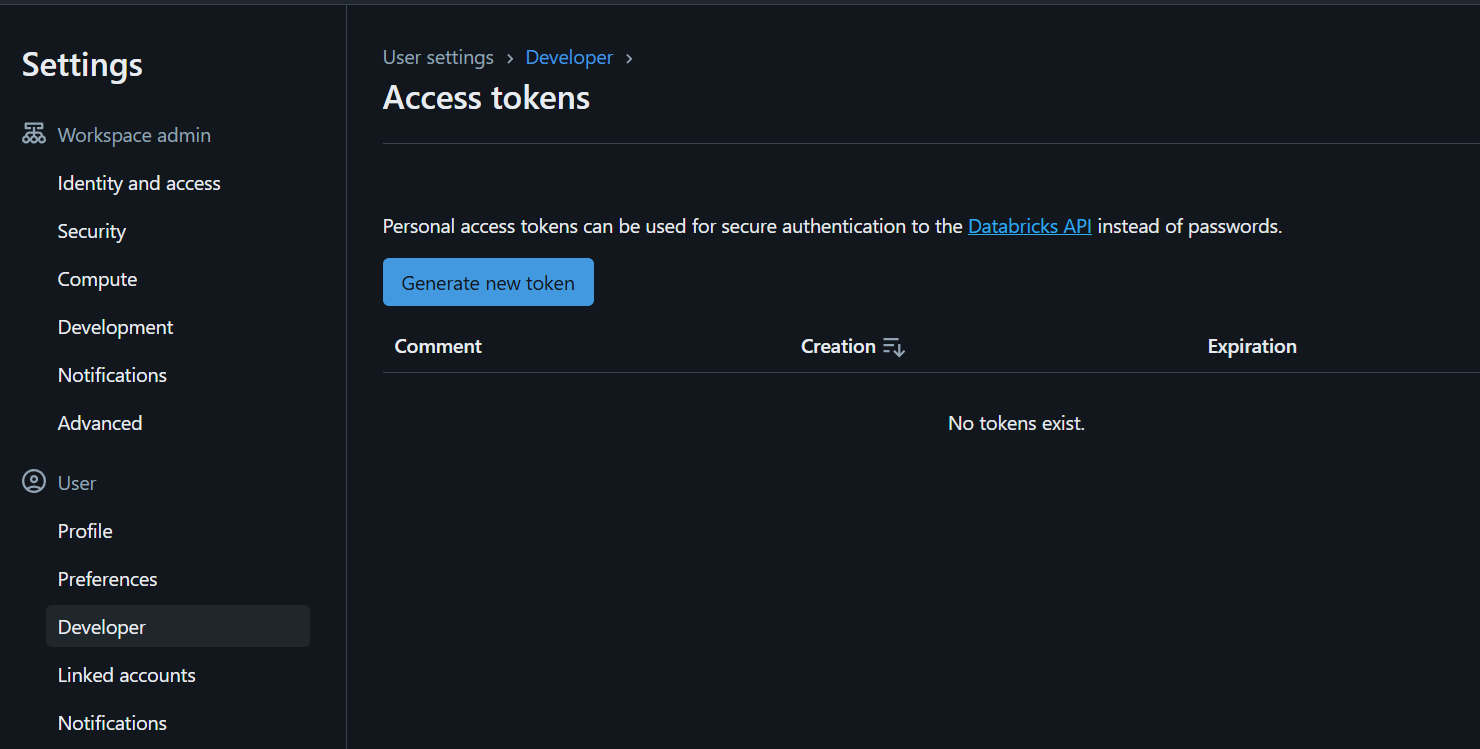
Enter a description and generate the personal access token. 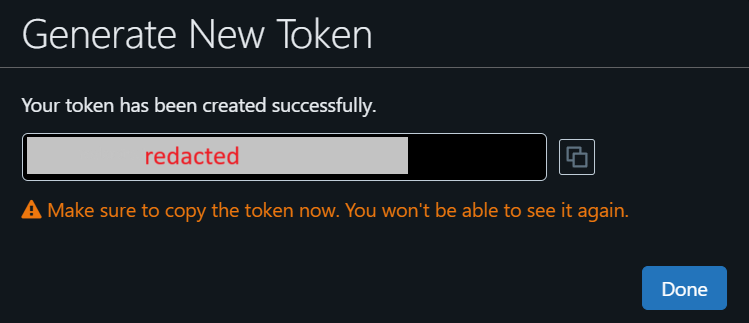
Make sure to copy it, as this will be the only time you will be able to access the full PAT.
1
databricks configure
Here you’ll be prompted for your Databricks workspace URL and personal access token (PAT) that you got in the last couple steps. Enter them when prompted.
Create a compute cluster
We are going to use a cluster with 4 cores per worker and enable auto-scaling up to 4 total workers (16 cores altogether), which, while a fairly modest amount of compute, should do the trick for this problem.
If we were in a hurry we could throw a lot more compute at the problem and get the answer much quicker, but we have until the end of the day, so we’re going to take the relaxing route.
We’ll also terminate the cluster after 15 minutes of inactivity to save costs.
1
2
3
4
5
6
7
8
9
10
11
12
13
14
15
16
17
databricks clusters create --json '{
  "cluster_name": "InterviewHammer",
  "spark_version": "15.4.x-scala2.12",
  "node_type_id": "Standard_D4ds_v5",
  "autoscale": {
    "min_workers": 2,
    "max_workers": 4
  },
  "autotermination_minutes": 15,
  "spark_conf": {
    "spark.executor.cores": "4",
    "spark.executor.memory": "14g",
    "spark.executor.memoryOverhead": "2g",
    "spark.sql.shuffle.partitions": "80",
    "spark.sql.adaptive.enabled": "true"
  }
}'
Grant Databricks access to the data
Add a secret for your storage account SAS token (generated in an earlier command).
1
2
3
4
5
6
7
databricks secrets create-scope mikeinterview --initial-manage-principal users
dburl=$(az databricks workspace show --resource-group mikeinterview --name mikeinterview --query "workspaceUrl" --output tsv)
databricks secrets put-secret --json "{
  \"scope\": \"mikeinterview\",
  \"key\": \"sastoken\",
  \"string_value\": \"$sasToken\"
}"
💡Note: If you need to update the secret in the future (like when your SAS token expires) you can generate a new SAS token and then run:
1
databricks secrets put-secret mikeinterview sastoken --string-value "$sasToken"
Create a notebook
In your Databricks workspace, click New -> Notebook 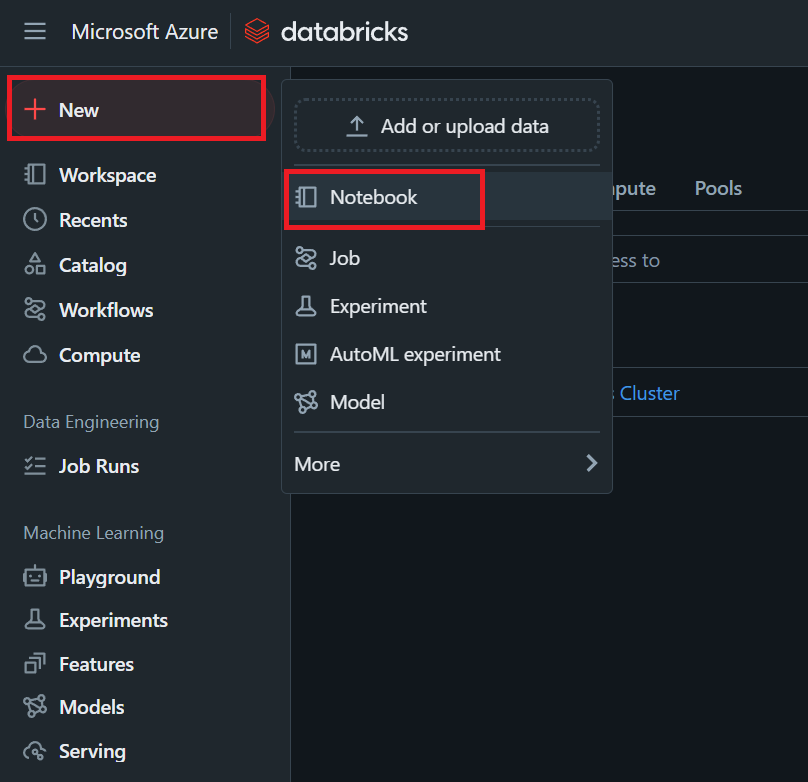
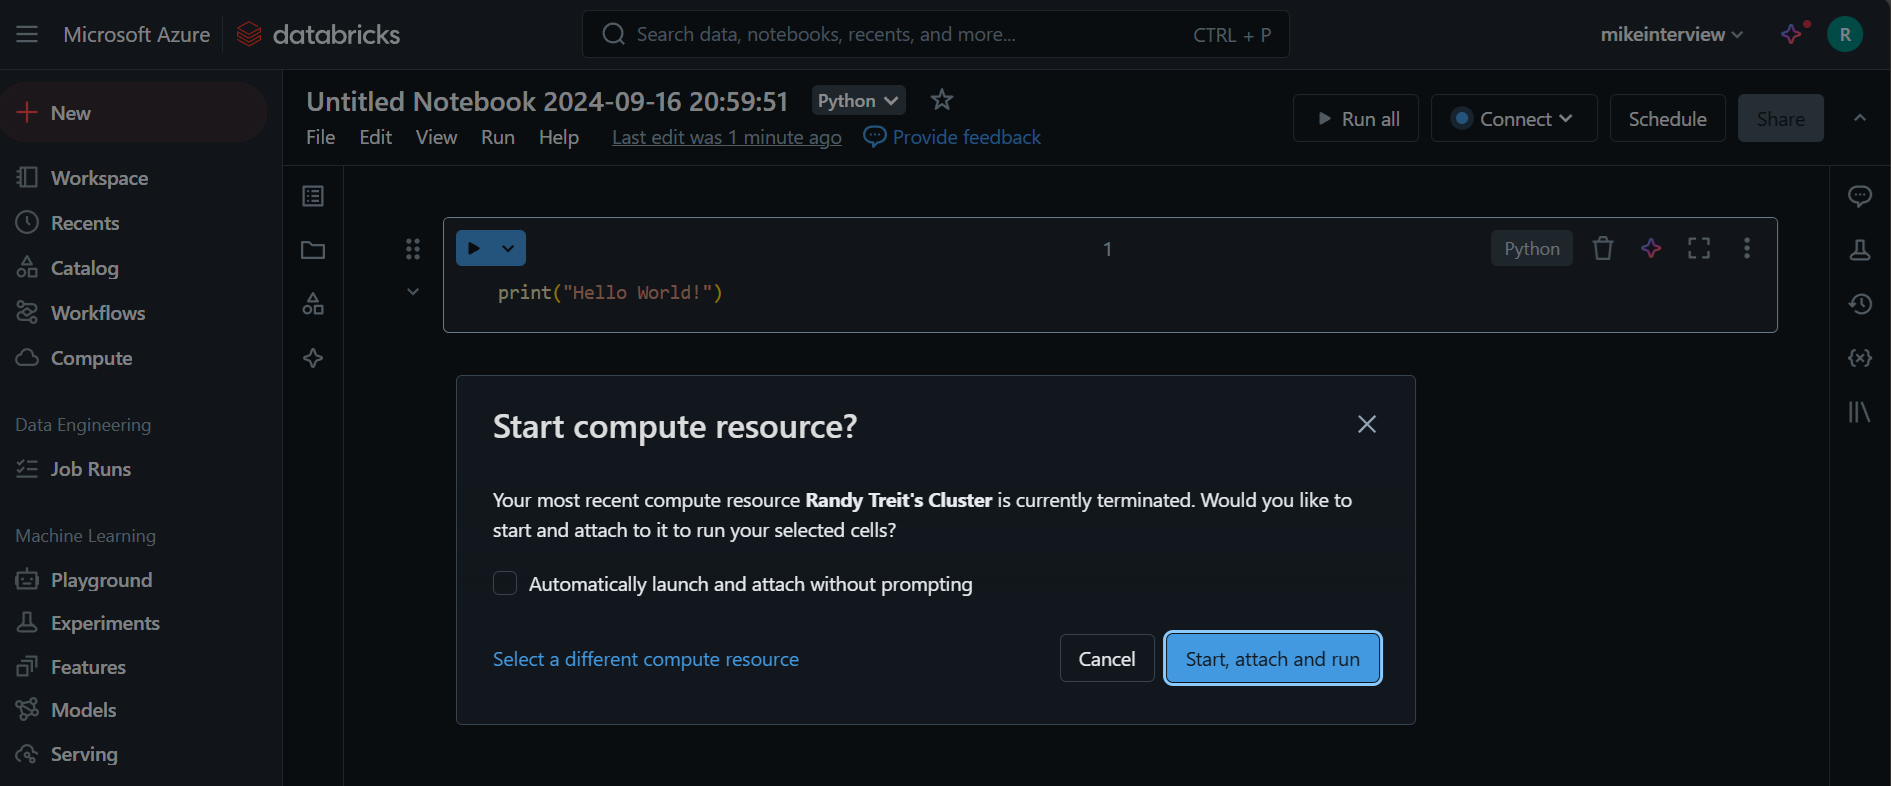
In the notebook code cell, run some code. If your cluster has already spun down, you’ll be prompted to start your compute cluster: click Start, attach and run.
The cluster should start within a few minutes and the code cell will run.
At this point we’re up and running with a cloud Spark environment we can use to try and solve the interview problem.
Solving the problem
The PySpark code to actually find the common integers between the 2 binary files is pretty straightforward. We just need to convert the raw bytes into a couple Spark dataframes and do an inner join to get the integers that are shared across both files. The notebook environment provides a nice way to perform data analysis in a structured, repeatable way.
Let’s break the solution down.
1
2
import struct
from pyspark.sql.types import BinaryType
The first step is to import the libraries needed to get the job done.
1
2
3
4
5
6
7
8
9
10
11
def to_int_list(byte_data):
    return struct.unpack("<" + "i" * (len(byte_data) // 4), byte_data)

def binary_to_dataframe(binfile):
    df = spark.createDataFrame(
        sc.binaryRecords(binfile, 4)
        .map(lambda x: to_int_list(x))
        .flatMap(lambda x: x),
        "int"
    ).toDF("value")
    return df
Next we define a couple functions that we can use to convert the data from raw bytes to integers in columnar form.
The function to_int_list() takes a sequence of bytes and uses Python’s struct module (part of the standard library) to convert each 4 byte sequence into a 32-bit integer. The ‘<’ indicates that the bytes are in little-endian format and the ‘i’ specifies a 32-bit integer.
The function binary_to_dataframe() uses the to_lint_list() function to split the binary file into 4-byte chunks, convert to 32 bit integer, and add that to a Spark dataframe in a column simply named “value.”
1
2
3
4
5
6
7
8
9
10
sas_token = dbutils.secrets.get(scope="mikeinterview", key="sastoken")
storage_account_name = "mikeinterviewstg"
container_name = "interview"
mount_point = "/mnt/interview"
if not any(mount.mountPoint == mount_point for mount in dbutils.fs.mounts()):
    dbutils.fs.mount(
      source = f"wasbs://{container_name}@{storage_account_name}.blob.core.windows.net/",
      mount_point = mount_point,
      extra_configs = {f"fs.azure.sas.{container_name}.{storage_account_name}.blob.core.windows.net": sas_token}
    )
We retrieve the SAS token we previously stored as a secret, and use it to mount our storage account to “/mnt/interview.”
1
2
3
4
5
6
a = binary_to_dataframe("/mnt/interview/1.bin")
b = binary_to_dataframe("/mnt/interview/2.bin")
a_deduped = a.drop_duplicates()
b_deduped = b.drop_duplicates()
joined = a_deduped.join(b_deduped, ["value"], "inner")
joined.write.parquet("/mnt/interview/joined.parquet")
Here’s where the real work happens. Each file is converted into its own Spark dataframe, de-duplicated (to avoid cartesian join issues), inner joined to find the integers that are common to each dataframe, and then written back out to storage as a series of .parquet files.
With my setup, this whole process took about 3 hours to complete. Again, if we needed the answer faster, we could have thrown more Spark compute at it. Also, I didn’t spend time trying to find a more optimal approach for utilizing Spark, opting for the obvious (if unsophisticated) inner join.
Generating the output binary file
I wasn’t able to find a clean way to take the results and generate a single binary output file in Spark. I suspect there must be a way, but given the time constraints, I opted for a rather inelegant but workable solution: download the parquet files and process them locally with a simple Python script.
Download the .parquet files
Let’s generate a fresh SAS token and download only the generated .parquet files.
1
2
3
4
5
6
7
8
9
10
11
12
13
14
15
16
17
18
19
20
21
22
23
24
25
26
27
28
29
if [ ! -d "parquet" ]; then
  mkdir parquet
  echo "'parquet' directory created."
else
  echo "'parquet' directory already exists."
fi

storageAccountName="mikeinterviewstg"
containerName="interview"
expiryDate=$(date -u -d "+5 days" +"%Y-%m-%dT%H:%M:%SZ")

sasToken=$(az storage container generate-sas \
    --account-name $storageAccountName \
    --name $containerName \
    --permissions rwdl \
    --expiry $expiryDate \
    --auth-mode login \
    --as-user \
    --output tsv)

if [ -z "$sasToken" ]; then
  echo "Failed to generate SAS token."
  exit 1
fi

echo "SAS token generated successfully."
blobUrl="https://${storageAccountName}.blob.core.windows.net/${containerName}?${sasToken}"
azcopy copy $blobUrl \
"./parquet" --include-pattern "*.parquet" --recursive --overwrite=prompt --check-md5 FailIfDifferent --from-to=BlobLocal --log-level=INFO
Given Spark’s default partitioning of 200, you should wind up downloading 200 parquet files.
1
2
3
4
5
6
7
8
9
10
11
12
13
14
15
16
17
18
19
Job 21796689-e0c2-944c-6e47-6be002038aa5 has started
Log file is located at: /home/rtreit/.azcopy/21796689-e0c2-944c-6e47-6be002038aa5.log

100.0 %, 200 Done, 0 Failed, 0 Pending, 0 Skipped, 200 Total,

Job 21796689-e0c2-944c-6e47-6be002038aa5 summary
Elapsed Time (Minutes): 9.4363
Number of File Transfers: 200
Number of Folder Property Transfers: 0
Number of Symlink Transfers: 0
Total Number of Transfers: 200
Number of File Transfers Completed: 200
Number of Folder Transfers Completed: 0
Number of File Transfers Failed: 0
Number of Folder Transfers Failed: 0
Number of File Transfers Skipped: 0
Number of Folder Transfers Skipped: 0
Total Number of Bytes Transferred: 15717864938
Final Job Status: Completed
Process the download parquet files
Install PyArrow, which we’ll use for processing the .parquet results.
1
pip install pyarrow
Fire up a new python script in your code editor of choice.
1
code generate_result_file.py
Save the following code:
1
2
3
4
5
6
7
8
9
10
11
12
13
14
15
16
17
18
19
20
21
22
23
24
25
26
import pyarrow as pa
import pyarrow.parquet as pq
import glob

def parquet_to_bin(parquet_folder, output_bin_file):
    try:
        with open(output_bin_file, 'wb') as bin_file:
            parquet_files = sorted(glob.glob(f"{parquet_folder}/*.parquet"))
            for file in parquet_files:
                try:
                    reader = pq.ParquetFile(file)
                    for batch in reader.iter_batches(columns=['value']):
                        values = batch.column(0)
                        if not pa.types.is_int32(values.type):
                            values = values.cast(pa.int32())
                        np_array = values.to_numpy(zero_copy_only=False)
                        np_array = np_array.astype('<i4')  # little-endian
                        bin_file.write(np_array.tobytes())
                except Exception as e:
                    print(f"Error processing file {file}: {e}")
    except Exception as e:
        print(f"Error writing to output file {output_bin_file}: {e}")

parquet_folder = "./parquet/interview/joined.parquet"
output_bin_file = "joined.bin"
parquet_to_bin(parquet_folder, output_bin_file)
This code finds all the .parquet files in the target folder and processes each file. It reads the “value” column from each .parquet file, using iter_batches() to read the file in chunks, which avoids having to read the whole file into memory. I’m not sure that the default batch size is, but you can adjust it if needed. Each batch is converted to a numpy array, cast to little-endian integers, and then written as raw bytes to the target file. So at the end we’ll have our 3rd .bin file, which will have all the integers that our Spark job found to be in common between the two source files.
1
ls *.bin
We now have 3 binary files: our 2 original input files and the fruit of our labor, the 3rd file which was the goal of the interview question:
1
2
3
-rw-r--r-- 1 rtreit rtreit 53687091200 Sep 29 10:07 1.bin
-rw-r--r-- 1 rtreit rtreit 53687091200 Sep 29 10:13 2.bin
-rw-r--r-- 1 rtreit rtreit 15703468572 Sep 29 19:29 joined.bin
In my case, we have 15,703,468,572 total bytes, so at 4 bytes per integer we know that we have 3,925,867,143 integers that are common to both files.
Let’s do a quick sanity check.
1
hexyl --length 64 joined.bin
 Picking the 10th random integer CA 08 00 80 (-2147481398) present in our result file, we should be able to find it in both source files.
1
2
3
4
5
6
7
8
9
10
11
12
13
14
15
16
17
def find_byte_sequence(file_path, sequence):
    with open(file_path, "rb") as f:
        chunk_size = 4096
        sequence = bytes(sequence)

        offset = 0
        while chunk := f.read(chunk_size):
            pos = chunk.find(sequence)
            if pos != -1:
                print(f"{file_path}: found at offset: {offset + pos}")
                break
            offset += chunk_size

print("Looking for byte sequence [0xca, 0x08, 0x00, 0x80]:")
find_byte_sequence("joined.bin", [0xca, 0x08, 0x00, 0x80])
find_byte_sequence("1.bin", [0xca, 0x08, 0x00, 0x80])
find_byte_sequence("2.bin", [0xca, 0x08, 0x00, 0x80])
This simple program will check if the byte sequence exists in all 3 files.
1
python3 find.py
1
2
3
4
Looking for byte sequence [0xca, 0x08, 0x00, 0x80]:
joined.bin: found at offset: 36
1.bin: found at offset: 2832105709
2.bin: found at offset: 2519789198
Wrapping up
Uploading the result file.
Since we need to provide Mike with the combined file, let’s upload it to blob storage so we can send him a link to it.
1
2
3
4
5
6
7
8
9
10
11
12
13
14
15
16
17
18
19
20
21
22
23
24
25
26
27
28
29
30
31
storageAccountName="mikeinterviewstg"
containerName="interview"
filePath="joined.bin"
blobName="joined.bin"
expiryDate=$(date -u -d "+5 days" +"%Y-%m-%dT%H:%M:%SZ")
sasToken=$(az storage container generate-sas \
    --account-name $storageAccountName \
    --name $containerName \
    --permissions rwdl \
    --expiry $expiryDate \
    --auth-mode login \
    --as-user \
    --output tsv)

if [ -z "$sasToken" ]; then
  echo "Failed to generate SAS token."
  exit 1
fi

echo "SAS token generated successfully."

blobUrl="https://${storageAccountName}.blob.core.windows.net/${containerName}/${blobName}?${sasToken}"

azcopy copy "$filePath" "$blobUrl"

if [ $? -eq 0 ]; then
  echo "File uploaded successfully to the blob container."
else
  echo "Failed to upload the file."
  exit 1
fi
1
2
3
4
5
6
7
8
9
10
11
12
13
14
15
16
Job 6eab282c-d7c6-404d-6895-4503c7eb576b summary
Elapsed Time (Minutes): 107.244
Number of File Transfers: 1
Number of Folder Property Transfers: 0
Number of Symlink Transfers: 0
Total Number of Transfers: 1
Number of File Transfers Completed: 1
Number of Folder Transfers Completed: 0
Number of File Transfers Failed: 0
Number of Folder Transfers Failed: 0
Number of File Transfers Skipped: 0
Number of Folder Transfers Skipped: 0
Total Number of Bytes Transferred: 15703468572
Final Job Status: Completed

File uploaded successfully to the blob container.
Now we just need to send our results to Mike to verify that we solved his problem, and we’re done! 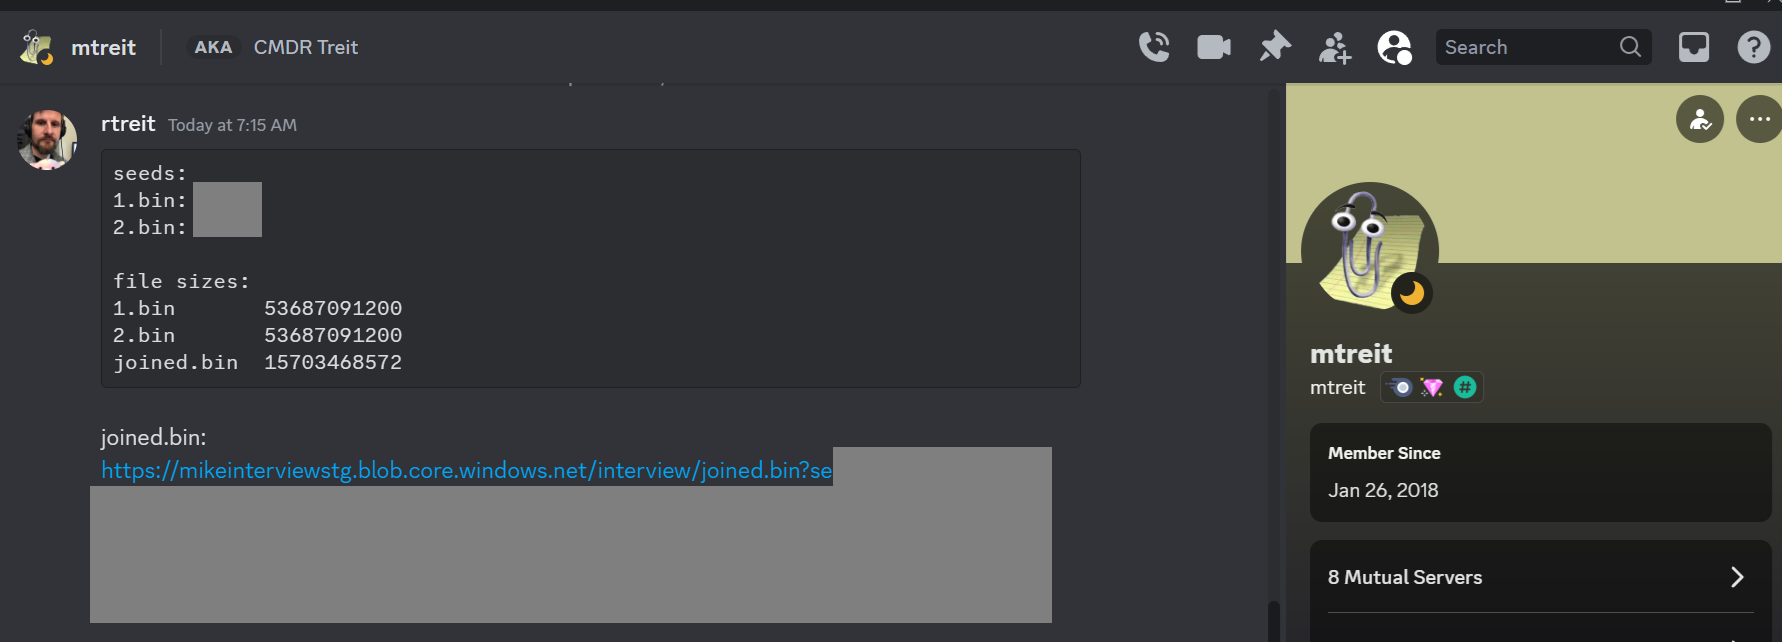
💡Note: To avoid spoilers, I redacted the random seeds used for my solution (and the SAS token for the file download) in the image.
A short while later I received the thumbs up: 
Success!
This was a fun little exercise in pragmatic problem solving using Azure cloud and Spark. Thanks to Mike for posing his interview question. If you haven’t checked out his blog, I highly recommend it: mtreit.com

